
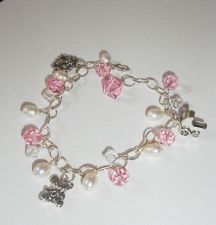
Baby Charm Bracelet
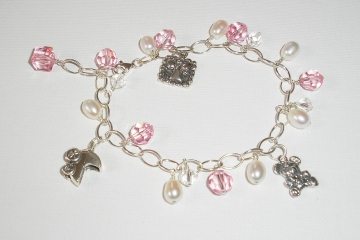
About This DesignTime: Approximately 30 minutes - 1 hour Level of Difficulty: Beginner - All Levels Cost: Varies, depending on materials selected. Approximately $25-40 as shown What a perfect gift for the new Mom or Mom-to-Be! This baby charm bracelet features baby-themed charms (baby buggy, angel, and teddy bear) and Swarovski crystal and pearl bead drops. Attached to sterling silver link chain so you can add more charms over the years as baby grows, or complete your design with additional beads as desired. Create an instant heirloom gift hat mom will treasure. Want to make this bracelet, or a variation for yourself? Let's get started!
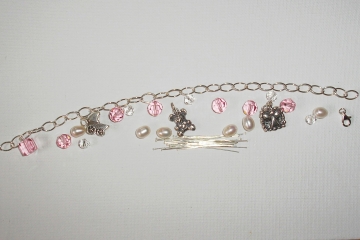
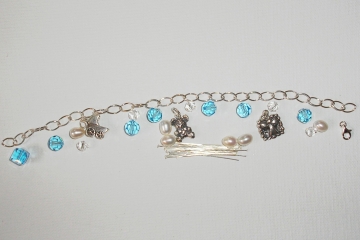
Step 1Gather your supplies. You can buy the baby charms here, or purchase charms and supplies from your favorite bead store. Here's what you'll need.
Need Supplies? Check my Jewelry Supply pages to find what you need
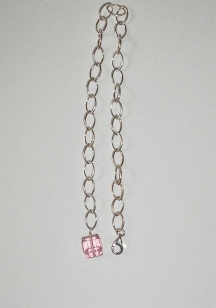
Step 2Attach lobster clasp and cube drop on either end of bracelet. Note- If you are using a pre-made charm bracelet, skip this step. You will use your pliers to open the split jump ring and attach it to one end of the bracelet. Close the jump ring so the lobster clasp is securely fastened to the chain. Follow the instructions on how to properly open and close jump rings, here. Slide a cube crystal bead onto a headpin, and make a wire loop at the top. Use a closed wire loop to attach the cube crystal bead as a drop to the other end of the bracelet (makes an easy extender chain for adjustable length, with a nice crystal bead drop detail). If you need help with the looping technique, click here.
Step 3Attach Baby Charms Attach each baby charm, evenly spaced along your bracelet, using your pliers to open the split ring and close it, securely fastening the charm to the link chain. TIP - Don't attach a charm too close to the cube bead on the very end, as this last inch or so of chain will function an extender chain so the length of the bracelet will be adjustable. You don't want the lobster clasp to close right on top of a charm, nor do you want the charm to be dangling below the extender chain. Use a bead design board, or fit it on your wrist to see what I mean.
Step 4Attach all remaining beads as "charms" Slide each remaining pearl and crystal bead onto a headpin and make a loop at the top with your round nose pliers. Use a bead design board or ruler to evenly space all of your beads and attach them along the length of the bracelet with closed loops. If you need help with this technique, click here. That's it, your gorgeous new Mommy Bracelet is ready to wear or give as a gift! Enjoy!
|
Home How To Make Jewelry Jewelry Basics Jewelry Projects Designer's Gallery Jewelry Supply Jewelry Business Jewelry Books and More Contact Me Privacy Statement Copyright 2006 Smart Sisterz LLC |

Join our Newsletter for more free jewelry design projects and tips each month!
Love bracelets? Check out this great book!