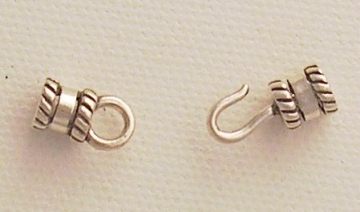
How to Attach Cord Ends
These tube cords come in two styles. You can use them with leather, rubber, suede or other cord. One style is intended to be crimped in the middle to hold the cord in place. The other style is simply a smooth end that cannot be crimped.
Crimp Style End
Step 1For the style that has a mid-section that can be crimped, you will insert the stringing material into the tube.
Step 2Next, grasp the midsection tightly with your flat nose pliers and squeeze to close the section tightly around your stringing material. Pull the cord gently to make sure it has a snug hold.
Tip - If desired for added security, add a drop of jeweler's glue into the end before squeezing the crimp shut. You will need to clean off any adhesive that squeezes out, before it dries.
Smooth Style End If your tube cord end does not have a mid-section that can be crimped, you will need to simply glue the cord in place with jeweler’s cement (like ES6000) or other strong glue. Make sure you get an end that closely fits the size of the cord diameter. If there is too much of a gap, or not enough room for any adhesive, you won't get as good a result. Follow these steps:
Step 1Add a good drop of glue to the end of your cord. TIP - If you are using smooth leather cord, you might scratch the leather up on the end with a bit of sandpaper to make it hold better.
Step 2Carefully feed your cord into the tube, being careful not to dislodge all of the adhesive. Leave this in a safe place where it won't be moved so it can dry. TIP - Tape this end down so it doesn't move while you do the other end.
Step 3Let the piece dry at least 24 hours before wearing, just to make sure it is secure. |
Home How To Make Jewelry Jewelry Basics Jewelry Projects Designer's Gallery Jewelry Supply Jewelry Business Jewelry Books and More Contact Me Privacy Statement Copyright 2006 Smart Sisterz LLC |
What's New?
Coming Soon! Join our Newsletter for free jewelry design projects each month!
