
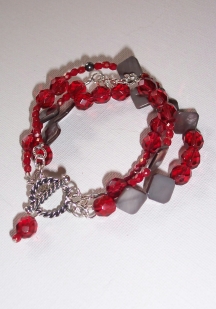
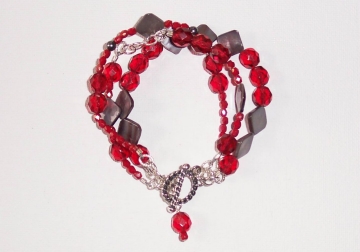
Red Crystal Bead Bracelet
About This DesignTime: Approximately 30 minutes - 1 hour Level of Difficulty: Beginner - All Levels (some wire wrapping) Cost: Varies, depending on materials selected. Approximately $15-20 as shown I found some inexpensive red glass "crystal" beads sold by the strand at my favorite bead shop. I got inspired to combine them in this red crystal bracelet with some diagonal charcoal colored shell bead. To mix things up and make this bracelet interesting, I used some stainless steel cable chain and a random triple-strand pattern. Wow! This one looks great on! (sometimes I decide to keep the jewelry I make...) Want to make this bracelet, or a variation for yourself? Let's get started!
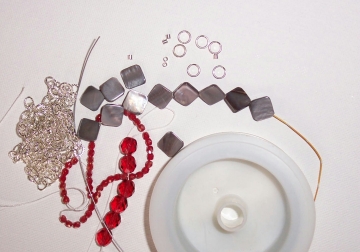
Step 1Gather your supplies.
Need Supplies? Check my Jewelry Supply pages to find what you need
Step 2Determine overall design and bead placement Use a bead board or arrange three strands of beads on a bead mat or cloth until you are satisfied with your overall design. This design is fairly random and asymmetrical, but you can do whatever pleases you. I tried to mix it up so none of the strands were identical, but still looked good next to each other. Mix both small and large beads together for interest. I also decided to use a short length of cable chain at the end of each strand, and one right in the center of one of the strands for interest. The important thing is to make sure you get the same exact length on all three strands so the bracelet lays properly on the wrist and doesn't sag. I achieved this by adding different lengths of cable chain at the end of each strand...some have only a couple links, some have more.
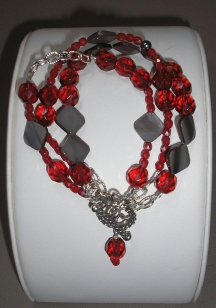
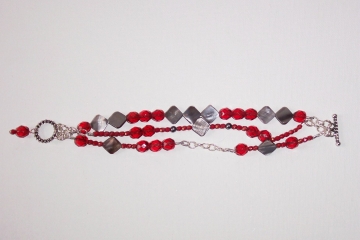
Step 3String beads, crimp ends We will be attaching each strand of flexible beading wire to cable chain at the ends. We will attach the cable chains to the clasp with the split rings or jump rings. TIP - This is your last chance to check and make sure all of your strands are the same length, before closing crimps!. First attach the beading wire (each strand) to the one end of the cable chain using a crimp bead. Slide a crimp bead onto the wire, feed the wire through the chain loop, then back through the crimp bead. Pull the wire snug, and crimp the bead closed. Follow the How to Use Crimp Beads instructions if you are not familiar with this technique. Repeat on other side, making sure you pull the wire tight to beads before crimping. Cut off remaining tails of wire with flush cutters. Step 4Attach the Clasp Now, use your jump rings or split rings with pliers to attach each cable chain end (each strand) to the clasp. Because I was using a double clasp, I attached two strands to one loop, and then one strand to the other. You may use a triple strand clasp if you have one. If you are using jump rings, follow these instructions to properly attach them. If you are using split rings, follow these instructions to separate attach them. TIP - As an option, try the new crimp bead covers to hide crimps for an even more finished look. Step 5Attach charm bead I always like to add a little detail to my bracelets, and in this design we will attach one bead charm to the toggle clasp as a way to balance the color and complete the design with that added touch. Slide one or more red crystals onto a headpin and make a loop at the top with your round nose pliers. Loop this through the end loop on the toggle clasp and close the loop. If you need help with this technique, click here to learn more.
That's it! Your new bracelet is ready to wear!
|
Home How To Make Jewelry Jewelry Basics Jewelry Projects Designer's Gallery Jewelry Supply Jewelry Business Jewelry Books and More Contact Me Privacy Statement Copyright 2006 Smart Sisterz LLC |
Join our Newsletter for more free jewelry design projects and tips each month!
Love bracelets? Check out this great book!