
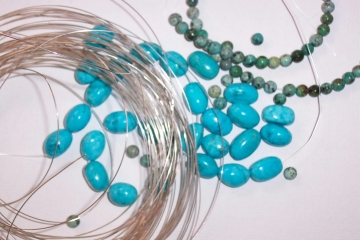
Turquoise Jasper Pendant About This DesignTime: Approximately 2-3 hours Level of Difficulty: All Levels (with Basic Wire Wrapping Knowledge) Cost: Varies, depending on materials selected. Approximately $25-35 as shown. I found some lovely large oval turquoise jasper stones, and I thought they would be great focal beads in a turquoise jasper pendant design. This necklace features the wire-wrapped chain technique, so it is a little time consuming to make, but in the end you will have a gorgeous and very unique pendant design you can be proud to wear, or give as a special gift. I made this with an extender chain so the necklace length will be adjustable from choker length to standard length necklace. Want to make this necklace, or a variation of it for yourself? Let's get started! Step 1Gather Supplies
Need Supplies? Check my Jewelry Supply pages to find what you need!
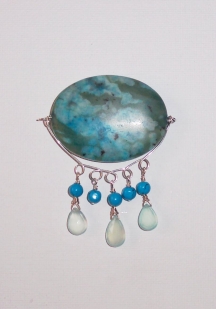
Step 2Craft the pendant drop We will use some sterling silver wire to create the pendant drop detail. Cut a length of wire and slide it through the jasper bead, making a closed wire loop on either end of the bead. If you need help learning to make a loop, follow these instructions. Next, cut a length of wire (about 10 inches or 25 cm) and using round nose pliers, begin creating five loops in the center of this wire, forming one loop close together to the last loop, spacing each loop evenly along the wire. These loops will form the bottom part of the pendant where we will hang the drop beads. TIP - You will need to keep adjusting the tips of the round nose pliers on the wire as you wrap the wire around them. Once you have five loops, please the wire in the center of the focal oval bead, and using your fingers, shape the wire so that it wraps up the side of the bead, forming a curve shape that matches the bead shape and size as closely as possible. Take note or mark (with sharpie marker) where the wire crosses the loops on the side of the bead where we will attach the wire components together. Now we'll attach this bottom wire component to the bead at the wire loops on either end of the bead. Make a round loop with your pliers at the point where the wire will attach to the bead. Note the angle--these loops attach on the side of the bead, so make sure you make the loop in the right direction so it will hang down. Use a simple open loop to attach the wire, so it hangs freely and easily below the focal bead. This is the hardest part of making this necklace, so don't be too frustrated if you need to try this more than once the first time you are learning the technique. If all else fails, you wasted a few inches of wire and you can start again. Now, let's attach the drop bead details. First, using a length of sterling wire, we will attach the chalcedony briolette beads. Cut several inches of sterling silver wire. Slide the chalcedony briolette bead into the center of the wire. Bend the ends of the wire up to meet in the middle at the top of the bead. Follow my instructions for wire wrapping a briolette to make a closed loop at the top with a stem. Slide a blue round turquoise bead onto the wire stem, and attach it to the bottom of our pendant wire loop using round nose pliers and a closed wire loop technique. If you need help learning to make a loop, follow these instructions. Alternate, attaching a briolette to the end loops, and center loop of the pendant. Now, let's attach the other turquoise beads. Slide each bead onto a headpin and attach it to the bottom of the pendant using a closed loop. That's it, your pendant detail is completed.
Step 3Make beaded chain Using a closed wire wrap loop to make connected beaded chain, (see instructions), connect the beads together until you reach the desired necklace necklace length.
Step 4Attach clasp, and extender chain Once your necklace is the desired length, you will attach the extender chain to one end, and the lobster claw clasp to the other. Just attach the components by sliding them onto the wire loop at one end of your bead, then make a closed wire loop. Add a turquoise drop bead detail to the end of the extender chain. Slide a bead onto a headpin, and attach the bead to the end of the extender chain with a wire loop.
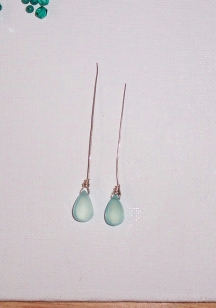
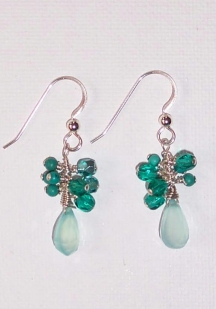
Matching Jewelry SetTry these matching earrings! Chalcedony Briolette Earrings
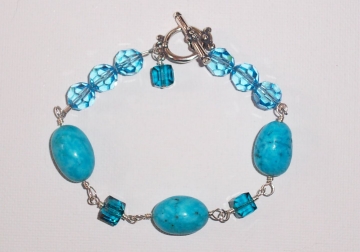
This bracelet also works well with this necklace design. Turquoise and Crystal Bead Bracelet
|
Home How To Make Jewelry Jewelry Basics Jewelry Projects Designer's Gallery Jewelry Supply Jewelry Business Jewelry Books and More Contact Me Privacy Statement Copyright 2006 Smart Sisterz LLC |


Hot off the presses! - Start Your Own Home Jewelry Party Business Today!
Join our Newsletter for more free jewelry design projects and tips each month!