Brass Vintage Earrings
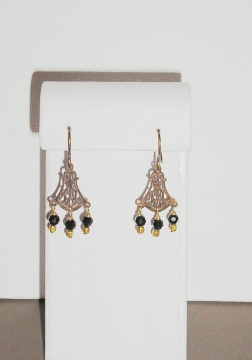
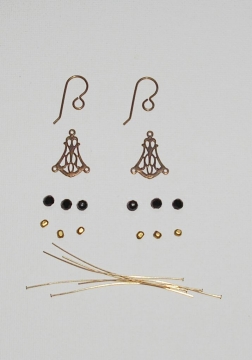
About This DesignI was in a vintage fashion mood, so I wanted to make some earrings using antique-look brass findings. This pair goes well with the vintage look pendant featured on the site, or when worn on their own. Stamped brass findings lend a real antique appearance and look great! Picture wearing these with a bohemian skirt or pretty feminine sundress! Because it's summertime, I also wanted to feature a very fast and simple 3-Step design so you can whip up these earrings in less than half an hour and be on your way. You can certainly modify this design by adding dangling chains and lots more beads, so feel free to improvise to get the look you want! Time: Approximately 30 minutes Level of Difficulty: Beginner - All Levels (some wire wrapping) Cost: Varies, depending on materials selected. Approximately $10 as shown Step 1Gather Supplies
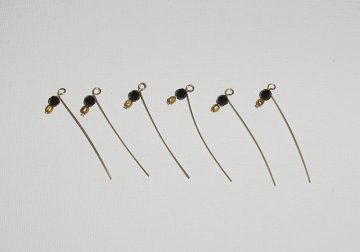
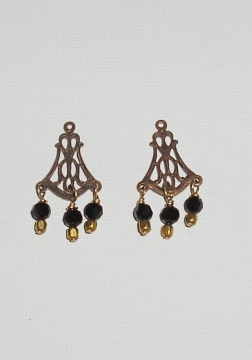
Step 2String Beads on Headpins String all of your beads onto the headpins, and make a round loop at the top. Attach the loop to the holes in the earring component, and make a simple closed wire loop.
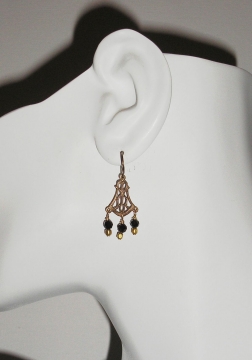
Step 3Attach to earring Use your pliers to open the loop on the earring wire. (Follow these instructions on how to properly open and close a wire loop). Slide your finished earring onto the loop, and carefully close the loop using your pliers. That's it, your new "vintage" earrings are ready to wear!
|
Home How To Make Jewelry Jewelry Basics Jewelry Projects Designer's Gallery Jewelry Supply Jewelry Business Jewelry Books and More Contact Me Privacy Statement Copyright 2006 Smart Sisterz LLC |