How to Use Crimp Beads
Crimp beads are small metal tubes that are squeezed tight around beading wire to hold beads in place. They allow you to easily attach a clasp to the end of your design. They are also used to hold a bead stationary along a piece of wire or cord as an integral part of the design (called a "bead station"), such as in illusion wire jewelry.
Close your crimp bead by squeezing it flat with regular pliers, or closed with a crimping tool, also referred to as crimping pliers, which creates a rounder appearance by folding the crimp bead around the wire. Also, there are new crimp covers on the market which close over the top of a crimped bead giving a more finished appearance.
Ready to crimp? Here is how it is done!
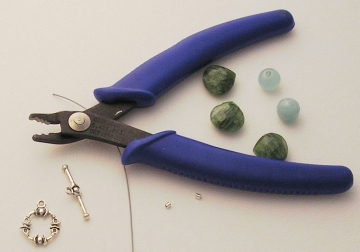
What you will need:
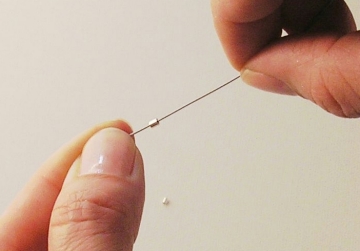
Step 1When you are ready to attach a clasp (or any end-piece you are using in your design, such as a jump ring, or extender chain),first thread the end of your wire through a crimp bead.
Slide a crimp onto the wire:
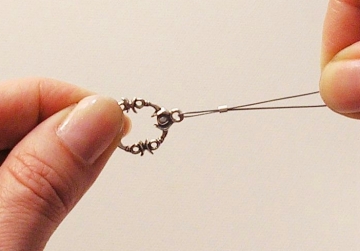
Step 2Next, the wire is looped through the clasp or extender chain, and then fed back through the crimp bead, forming a loop. It is a good idea to leave a tail of wire at least a couple of inches longer than you think you need so you will have some wire to work with.
Feed the wire through the clasp, and back through the crimp bead:
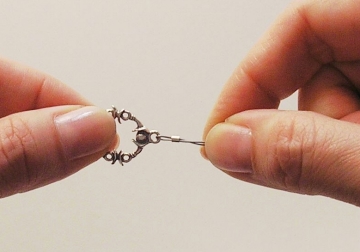
Step 3Slide the crimp bead up close to the end of the clasp or end-piece. Check the crimp bead and make sure it is not too close to the clasp or end-piece. You want to have a small loop around the clasp or end-piece, but not so small that it holds the clasp so tightly that it cannot move freely.
Designer's TIP - You want to have a little play in the loop. Especially for bracelets that will fit the wrist snugly, you will want the clasp to hang a little looser to allow for some flexibility and movement.
It's very disappointing if the wire comes loose and the clasp breaks off.
Then you have to remake the bracelet simply because your loop was too tight and your clasp
couldn't move! Also, having some flexibility makes it much easier for the wearer to put on.
Slide the crimp up close to the clasp, but not too close--the clasp should have some room to move and dangle freely: |
| Designer's TIP - Sometimes, you just don't get a perfect crimp. It either didn't fold over nicely or the wire pulls loose. If this happens, cut the crimp bead off the end, and just start over again with a fresh new crimp bead. This is another good reason to leave yourself a little extra wire to play with on the end of your design. |
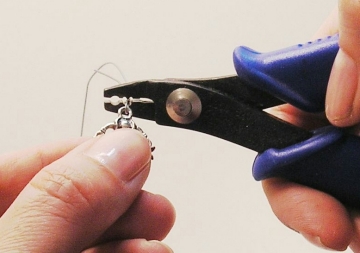
Start with the crimp bead in the dented channel of the tool, and a wire on either side of the crimp bead and squeeze pliers closed to dent the bead:
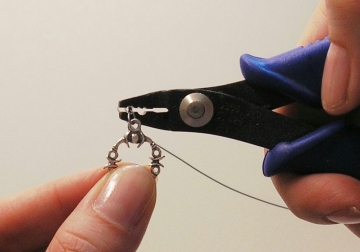
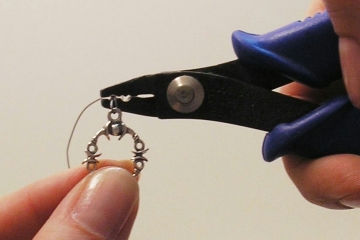
Next place the dented bead on its side in the rounded channel of the tool:
Step 4 with Flat Nose Pliers
Using regular flat or needle nose pliers works to close crimp beads, too. There is only one step to closing the crimp. Simply grasp the crimp bead with the flat section of the pliers. Squeeze gently but tightly to smash the crimp bead flat. Check to make sure the crimp bead is tightly holding the wire so it won't pull free. That's it! You will repeat this on the other end of your design.
Step 5
Thread your first bead onto the wire. Thread both pieces of flexible wire through the bead hole if possible. Use your flush cutters to cut the cord off as close as possible to the bead. Thread the rest of your beads according to your design until you reach the other end.
Slide a bead onto both wires if possible:
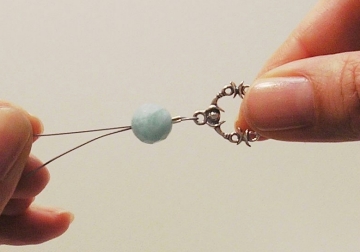
Cut the wire flush up against the bead:
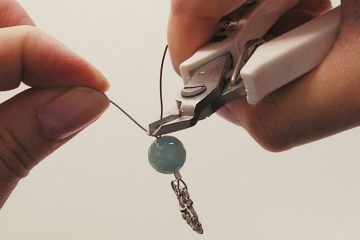
Complete your design by stringing all remaining beads:
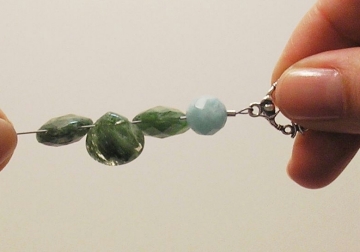
Step 6
When you are ready to attach your final clasp to the end of your piece, thread the crimp bead and clasp just like before, but now you will want to tighten all of your beads by pulling on the tail end of the loose wire. This will snug all your beads up together, leaving no gaps in your design. If you need more leverage to pull the wire tight, use your pliers; one to hold the clasp and the other to grasp and pull the wire. Crimp your final bead, and you're finished!
More Help on Crimping Beads
Need a little more help on how to crimp beads using a crimping tool? Check this video animation at Beadalon to see how it is done!
Do you want to know how to use the new Crimp Bead Covers? Click Here!
Home How To Make Jewelry Jewelry Basics Jewelry Projects Designer's Gallery Jewelry Supply Jewelry Business Jewelry Books and More Contact Me Privacy Statement
Copyright 2006 Smart Sisterz LLC
Hot off the presses! - Start Your Own Home Jewelry Party Business Today!
Join our Newsletter for more free jewelry design projects and tips each month!
