
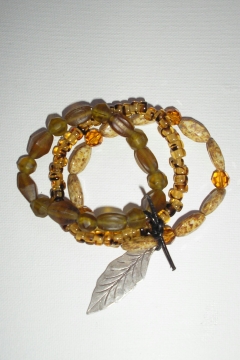
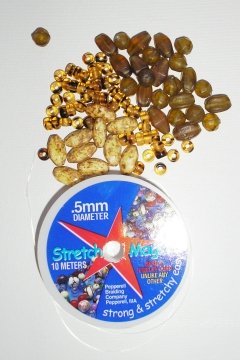
Stretch Bracelet Set About This DesignTime: Approximately 30 minutes - 1 hour Level of Difficulty: Beginner - All Levels Cost: Varies, depending on materials selected. Approximately $10-20 as shown Stretch bracelets are very popular because they are generally inexpensive and easy to make. Here I have combined earthy colors of beads in a great stretch bracelet set that features a Hill Tribe Silver leaf charm, tied with leather for a rustic feel. Want to make this bracelet, or a variation for yourself? Let's get started! Step 1Gather your supplies. Here's what you'll need.
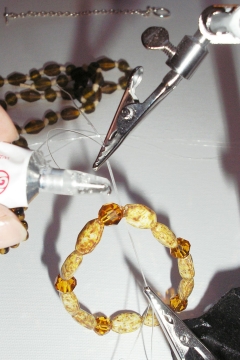
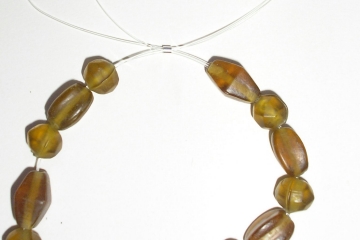
Need Supplies? Check my Jewelry Supply pages to find what you need Step 2String beads on elastic cord Cut several lengths of elastic cord, leaving several extra inches to make it easy to knot. If your cord is very fine, you might want to use two strands per bracelet to make it stronger. Decide how long your bracelet will be, and determine the placement of the beads in your design. You can use a bead board or ruler to check the length. I made my bracelet about 7 inches long to fit the wrist snugly. Tie a knot on one end of the elastic, or place some tape over the end, and string all of your beads onto the elastic cord. Check the length and overall design and make adjustments by adding, removing, or re-positioning beads until you are happy with the look of the bracelet. Step 3Next, pull the cord so the elastic is taut (so it has some spring to it and the bracelet will fit snugly) and tie your knots. Follow my instructions on how to use elastic cord. Another option is to use a crimp bead instead of a knot. If you are tying knots, it helps to use a "third hand" tool as I have in this photo, to hold the cords tight while you are tying the knot and applying glue. Glue is not really optional! When knotting, you must use glue otherwise at some point your knot will likely come free and your bracelet will break. Apply a dab of glue to your knot (a headpin makes a handy tool) and hold it steady for at least 30 seconds so the glue can dry before proceeding. Generally it's a good idea to wait 24 hours to wear the bracelet to allow glue to completely dry.
Using a crimp bead in place of a knot: If you prefer the easy of a crimp bead to knotting, feed the cords through either side of the crimp bead in opposite directions like this. Pull the elastic taut, then use your crimping tool or pliers to crimp the bead. TIP - A drop of glue might not be a bad idea inside the crimp for added security, just be sure you clean it off your crimping pliers before it dries and gums things up.
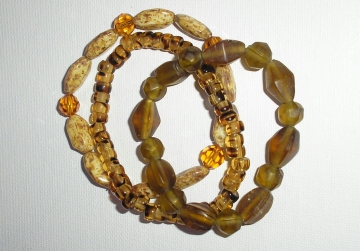
Repeat for each bracelet. Make as many strands as you like, I made three bracelets in complementary colors.
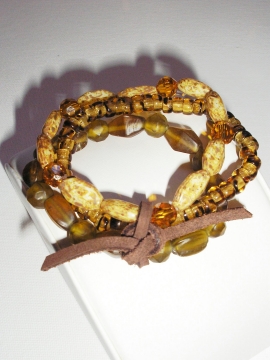
Step 4Attach the charm Slide your charm onto the leather cord. Tie the three bracelets together with a knot. Leather cord, suede, or ribbon works well for this purpose. Example - Suede lace tie with no charm
Here it is with black leather cord and the Hill Tribe Silver leaf charm:
That's it! Your gorgeous new stretch bracelet set is ready to wear or give as a great gift!
|
Home How To Make Jewelry Jewelry Basics Jewelry Projects Designer's Gallery Jewelry Supply Jewelry Business Jewelry Books and More Contact Me Privacy Statement Copyright 2006 Smart Sisterz LLC |
Join our Newsletter for more free jewelry design projects and tips each month!
Love bracelets? Check out this great book!